Chapter 12
Using the Library Panel
In This Chapter
![]() Importing images without adding them to the Stage
Importing images without adding them to the Stage
![]() Applying Symbols effectively
Applying Symbols effectively
![]() Selecting fonts
Selecting fonts
The Library panel provides an easy way to work effectively with images, Symbols, and fonts. In this chapter, I discuss how to add images to the Library panel without adding them to the Stage.
I also provide details on working with Symbols— which may appear daunting at first, but once you get the hang of it, you realize Symbols are true timesavers. That’s especially true if you tend to use the same types of Symbols (such as buttons or menu items) on a regular basis.
Last, but certainly not least, I delve in to the details on working with and adding fonts to Adobe Edge Animate CC. By using the web, you can find and use thousands of fonts, and most likely you can use them all in your animation.
Positioning Images
The Library panel is a great place to view all of your assets, or images, in one spot. You can use the Library panel in association with images in the following ways:
 Import multiple images at once without having them appear on the Stage.
Drag images onto the Stage from the Library panel.
Image filenames remain consistent in the Library panel even if you rename them in the Elements panel.
You don’t delete or rename images in the Library panel.
You can find the Library panel on the right side of the interface (see Figure 12-1).
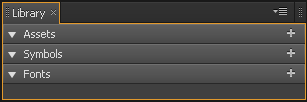
Figure 12-1: Use the Library panel for Assets, Symbols, and Fonts.
Adding images
You can add images a few different ways in Edge Animate, including the following:
Drag and drop from your desktop to the Stage.
Import from the main menu (refer to Chapter 3).
Use the Library panel.
You can use the Library panel to import more than one image at a time. Simply gather all the images you want to use for your project into a single folder; then click the + icon next to Assets. When you do so, you can then navigate your hard drive to find and select images to import into your composition. After you select the images you want to import, they appear in the Library panel (as shown in Figure 12-2).
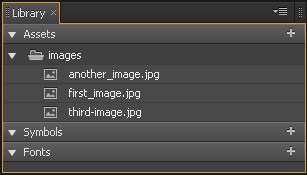
Figure 12-2: Use the Library panel to import images without them appearing on the Stage.
 One of the differences between importing images from the Library panel and importing them via the main menu is that the images don’t appear on the Stage and the Timeline. That way, you have your images ready for use, but they don’t litter your Stage.
After you have images in the Library panel, you can click and drag them onto the Stage. You can double-click the name of the image to rename it if you so desire.
If you right-click an image from the Library panel, you can open the images folder associated with your composition, as shown in Figure 12-3.
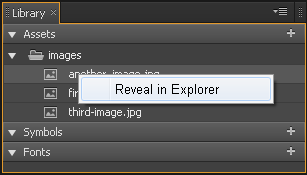
Figure 12-3: Navigate to the folder from which you imported the image.
Deleting and renaming images
Believe it or not, you don’t delete nor rename images in the Library panel. Instead, you must use either the Timeline or the Elements panel — and before doing that, you have to add the image to the Stage. You can add an image to the Stage from the Library panel with a click and a drag.
When you move an image from the Library panel to the Stage, it becomes an element and — like all elements — it appears in both the Elements panel and the Timeline. Once an image becomes an element, you can rename it and/or delete it, as with any other element.
Even if you rename or delete an image element, it remains in the Library panel, but you can rename it or delete it from the Timeline and the Elements panel. To completely remove an image, first remove all instances of the image from the Stage. Then, from the Library panel, choose Reveal in finder. Then you can delete the images from your hard drive.
Administering Symbols
You can create complex Symbols with rich functionality that you may need when you start developing complicated compositions. On the flip side, you can also create basic Symbols for everyday use.
 Basically, Symbols allow you to create nested animations with independent timelines and interactive capabilities. In this section, I discuss turning elements into Symbols; editing Symbols; working with Symbols and labels; and finally how to save, export, and import Symbols.
Although Symbols do have a different workflow from that of elements, once you’re comfortable working with them, you won’t have any problems at all.
Creating Symbols
To create a Symbol, follow these steps:
1. Create an element such as a text box, a rectangle, or an imported image.
See Chapter 3 for more information on creating elements.
2. Convert the element to a Symbol.
You have three choices on how to convert that element into a Symbol:
• Right-click the element from the Stage (as shown in Figure 12-4) to access a list of options. From that list, choose Convert to Symbol.
• Select an element on the Stage and then click the + next to Symbols in the Library panel (as shown in Figure 12-5).
• Use the keyboard shortcut: Ctrl+Y or  +Y (Mac).
3. Name the Symbol in the Create Symbol box (see Figure 12-6).
You have to play by the rules when you name a Symbol: no spaces and no accented letters or numbers. You can use an underscore, though.
Leave Autoplay Timeline checked if you want any animations you create for this Symbol to automatically play in the Timeline. Uncheck this box if you don’t want any animations to automatically play.
If you want a particular part of your composition to play only if an action is triggered, then you do not want a Symbol to play automatically in the Timeline. For example, you can create a Symbol that plays only if your audience clicks a button.
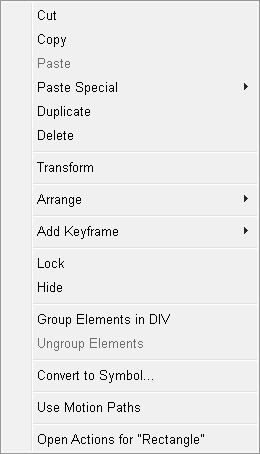
Figure 12-4: Create a Symbol by right-clicking an element and then choosing Convert to Symbol.
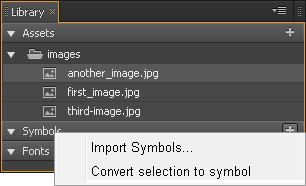
Figure 12-5: Click the + next to Symbols to convert an element to a Symbol.
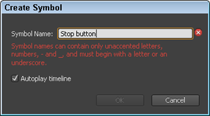
Figure 12-6: Name your Symbol.
After you create a Symbol, it appears in the Library panel (as shown in Figure 12-7). You can then drag it on the Stage for repeated instances, save it for use in another composition, or copy and paste it directly into another project.
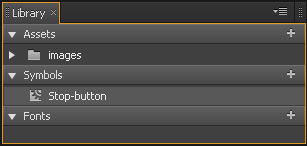
Figure 12-7: Symbols appear in the Library panel.
When you create a Symbol, a new section, called Playback, appears in the Properties panel (see Figure 12-8).
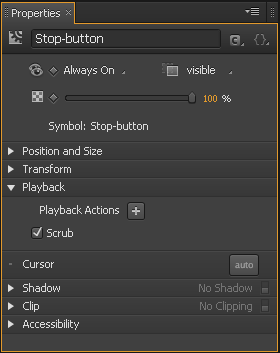
Figure 12-8: The Playback properties appear when you select a Symbol.
I discuss the Playback properties in the section, Adding playback actions, later in this chapter.
Editing Symbols
After you create a Symbol, you can edit it with a right-click and then choose Edit Symbol. If you right-click from the Stage, you see the options shown in Figure 12-9.
If you right-click a Symbol from the Library panel, you see another set of options, as shown in Figure 12-10.
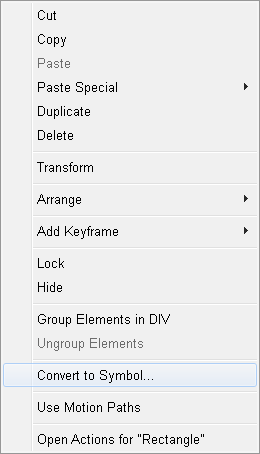
Figure 12-9: Right-click from the Stage for one set of edit options.
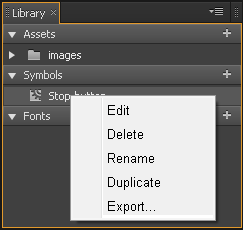
Figure 12-10: More options to choose from in the Library panel.
While you're in Edit mode for a Symbol, the Stage turns gray and breadcrumb-type navigation appears in the top-left corner of the Stage, as indicated in Figure 12-11. In this example, Stop_button is the name of the Symbol. When you're editing a Symbol while the Stage is gray, edits you make affect only the Symbol's independent Timeline and not the composition's overall Timeline.
While in Edit mode for Symbols, you can get back to the Stage simply by clicking Stage from the breadcrumb navigation (as highlighted in Figure 12-11).
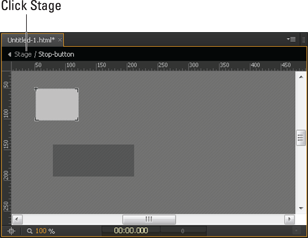
Figure 12-11: Navigate back to Stage by clicking Stage.
Adding features
Symbols have their own Timeline, which works in conjunction with the main Timeline. As a result, Edge Animate provides specific features for use with Symbols, including the following:
A Scrub check box
Playback actions for Symbols
Labels
Disabling animation
A Symbol’s Timeline allows you to stop a Symbol’s animation sequences from playing while you view an animation from the Stage.
In the Playback section of the Properties panel, you can find a Scrub check box (see Figure 12-12). The Scrub check box controls how animation appears on the Stage:
If you leave the Scrub box checked, the Symbol’s animation sequences unfold on the Stage.
If you uncheck the Scrub box, the Symbol’s animation sequences don’t appear on the Stage.
 Regardless of the Scrub box, you see all the animations when you preview in the browser.
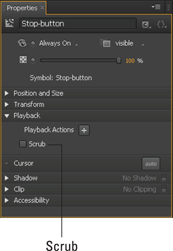
Figure 12-12: Uncheck the Scrub box to stop Symbol animations from playing on the Stage.
Adding playback actions
Adding playback actions to Symbols is easy to do from the Properties panel. You can think of playback actions as a type of trigger for Symbols. Figure 12-13 shows the list of options that you can use, including Play and Stop.
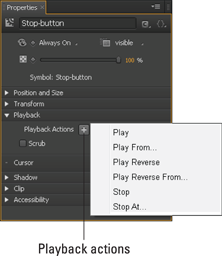
Figure 12-13: Add playback actions to insert a type of trigger for Symbols.
When you select a Symbol from the Stage and then choose a playback action, Edge Animate inserts an icon into the Timeline, as indicated in Figure 12-14. In addition to inserting a playback action from the Properties panel, you can also create a playback action from the Timeline, as highlighted in the figure.
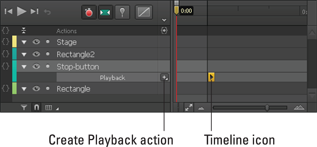
Figure 12-14: An icon appears in the Timeline when you select a playback action.
For best use of playback actions, create an animation sequence for the Symbol; otherwise there’s nothing to stop, play, play from, and so on.
To edit the playback action from the Timeline, simply double-click the icon, you can then edit the time and the action (shown in Figure 12-15).
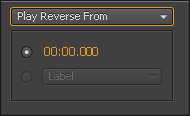
Figure 12-15: Edit the playback action by double-clicking the icon in the Timeline.
You can also use labels with playback actions, as discussed next.
Labeling
You can use labels (which I cover in detail in Chapter 5) in association with playback actions. The difference between using labels with elements as compared to Symbols is that you have to place the label in the Timeline while in edit mode for the Symbol. Otherwise the label option (as shown in Figure 12-15) appears dim. Follow these steps to use labels with playback actions:
1. Create a Symbol on the Stage that has an animation sequence.
2. Right-click the Symbol and choose Edit Symbol.
3. Position the Playhead in the Timeline where you want the label to appear.
4. On the main menu, click Timeline and then Insert Label.
5. Name your label in the Timeline.
6. Exit Symbol Edit mode by going back to the Stage (click Stage from the breadcrumb navigation found above the Ruler).
The label you just created disappears from the Timeline, but don’t worry, it’s still there.
7. Add a playback action and then open it for editing.
When you choose From or At playback actions, the label option becomes active, as shown in Figure 12-16 where I named the label Start Show.
When you close this box, the name of the label appears in the Timeline next to the Playback Action icon.
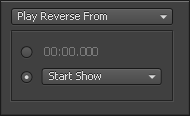
Figure 12-16: Choose a Symbol label instead of using a specific time.
You can preview playback actions on the Stage (provided you left Autoplay checked while editing the Symbol), or you can preview in the browser.
To change the location of the Symbol label in the Timeline, go back to Symbol Edit mode and drag the label up and down the Timeline.
Exporting and importing Symbols
Adobe knows that as an animator, you probably like to reuse commonly used Symbols, such as a slideshow, so Adobe made it very easy for you to:
Save Symbols: Right-click an element and choose Convert to Symbol (shown earlier in Figure 12-4).
Export Symbols: Right-click a Symbol from the Library panel or the Stage and then choose Export (shown earlier in Figure 12-10).
Import Symbols: In the Library panel, click the + icon and choose Import Symbols (see Figure 12-17).
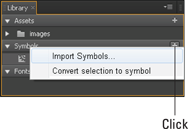
Figure 12-17: Import Symbols from the Library panel.
You can copy and paste a Symbol from one project to another. Simply select the Symbol from the Stage, copy it, and then open another project and paste it in.
Managing Fonts
Adobe Edge Animate CC provides myriad ways to use and add different fonts to your composition. In this section, I discuss the following:
Selecting different default fonts from either the Properties panel or the Library panel
Adding new fonts from a variety of sources
When it comes to font choices, you won’t be at a loss.
Selecting fonts
Adobe Edge Animate CC allows you to choose fonts from a default fonts list, as shown in Figures Figure 12-7 and Figure 12-19, which is accessible from the Properties panel after you create and select a text box (refer to Chapter 10 for more on animating and formatting text). These fonts include the standards, such as Georgia, Verdana, and Times New Roman.
The Library panel also has another set of fonts from which you can choose. To open this menu, follow these steps:
1. Click the + next to Fonts in the Library panel, as shown in Figure 12-18.
From here, you can choose an Edge Web Font, or click the Custom tab to add a new font. If you choose an Edge Web Font, simply select the font that you like and then click Add Font at the bottom of the box.
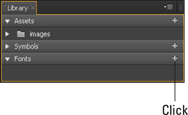
Figure 12-18: Click the + to start the process of adding a web font.
2. If you clicked the Custom tab, then click the + next to the Font Fallback List.
Doing so opens up another list of fonts you can choose.
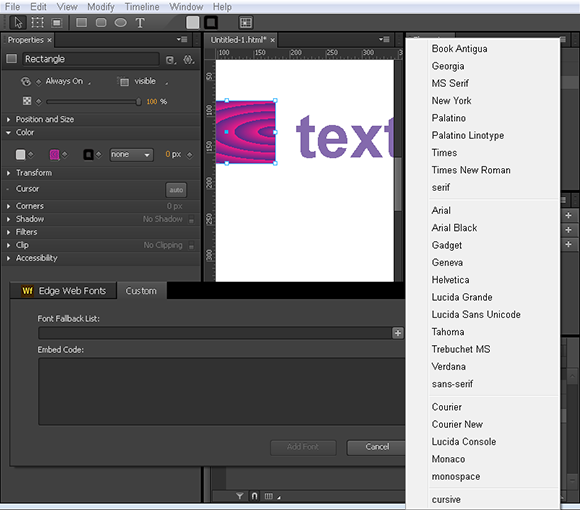
Figure 12-19: Font Fallback List from the Library panel.
3. Choose a font from the list; then click Add Font.
The font you chose appears in the Library panel, as shown in Figure 12-20.
After you add a font in the Library panel, you can click and drag the name of the font onto the Stage. When you do so, Edge Animate creates a text box for you that is pre-populated with text.
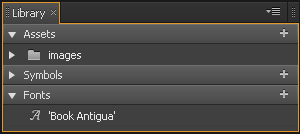
Figure 12-20: Fonts that you add appear in the Fonts section of the Library panel.
After you drag a font name onto the Stage, that font also becomes available in the Properties panel when you have a text box selected.
You can also add web fonts from Font Squirrel, fonts.com, and other types of available web fonts to your Edge Animate composition — using the same basic procedure described in the next section on using Google web fonts.
Adding Google web fonts
If you’re a fan of Google web fonts, or you’re simply tired of using the same old font that everyone else uses, then you can add a Google web font to your Edge Animate composition.
As of this writing, Google boasts 624 (and counting) different web fonts from which you can choose.
To add a Google web font, follow these steps:
1. Use a web browser to visit the Google Web Font site (www.google.com/webfonts) and pick a font you like.
2. When you find a font you like, click Quick-Use, as shown in Figure 12-21.
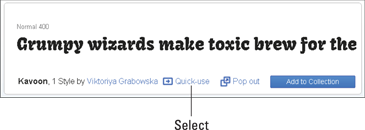
Figure 12-21: Select a Google web font.
Depending on the font you chose, you may have the option to customize the font with various attributes.
You also see a Page Load indicator, as shown in Figure 12-22. This tells you whether the font loads quickly or slowly onto your web page. My example font has a fast page-load time.
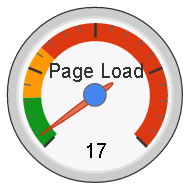
Figure 12-22: Page Load indicator.
Consider using fonts that have a fast page-load time for a couple reasons:
• If your page takes more than a few seconds to load, visitors will leave. They want the page to load quickly.
• Google uses page-loading times in its algorithms to determine search results. You don’t want your search results hurt based on the fonts you chose.
• Also, use only styles that you really need. The more styles you add, the slower the page load.
3. With the font customized, scroll down the page until you see a bit of code, as shown in Figure 12-23; copy this code.

Figure 12-23: Copy the Google web font code.
4. If Edge Animate isn’t open, open it now.
5. In the Library panel, click the + Symbol next to Fonts.
The Font box opens. Click the Custom tab.
6. In the Embed Code box, paste the code that you copied in Step 3.
7. Type the name of the font in the Font Fallback List, as shown in Figure 12-24.
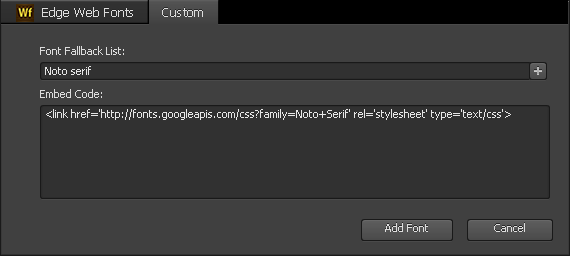
Figure 12-24: Copy the Google web font’s code into the Embed Code box and name the font in the Font Fallback List.
8. Click Add Font.
You’re done!
Now that you’ve added a custom font, when you click the font drop-down arrow from the Properties panel, you can select your custom font from the list (see Figure 12-25).
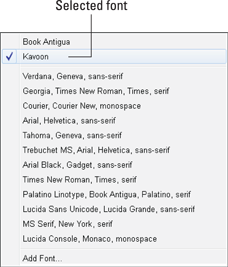
Figure 12-25: Finding Your custom font.